
How To Make A Wooden Planter
For many people, gardening is a very therapeutic experience. Whether you like to grow vegetables, flowers or just enjoy the green space that your garden provides, it’s easy to get lost in how much time and effort goes into creating something so beautiful. This article will discuss how to make a wooden planter of your own using tools that are readily available at any hardware store.

The items that need for this project:
- Saw
- Drill
- Wood screws
- Tape measure
- 9 Western Red Cedar Pickets (5/8” x 51/2” x 6’)
- Pressure-treated timber 8 foot (2×4)
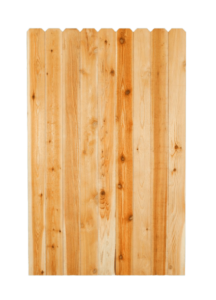
(9 Western Red Cedar Pickets)
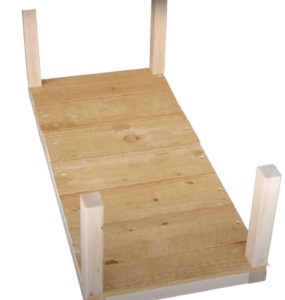
Step1: Build A Bottom Frame
After getting all of those supplies first you need to create a frame with the 8-foot timber which will go inside and hold up the bottom shelf.
To do this pick the 2×4 and rip it half through the middle. You can use a table saw or skill saw to do this. It depends on which one you have. Then cut down the legs and attach them together with three-inch wood screws. Now the frame will be something like this.

Step2: Attach floor with the Bottom frame
Once your frame is ready now we need to move to the 6 boards for the floor.
Cut the Western Red Cedar Pickets into six pieces and attach them with the frame with screws that we have made before.
Step3: Inner frame
Now we need to add the inner frame. For this, we need 4 pics of (2×4)
We can cut the 4 pieces of them according to the required depth of the box.
Now attach the 4 pieces from the bottom side of the floor that we have made before something like this:
Step4: Siding
The next step is siding. For this, you need to Cut the pickets to length according to the dimensions of your box. You need six longer pieces and six shorter pieces. On each side of the box, you need to attach the 3 pieces of them. Make sure you are attaching them outside of our previous frame. Now your frame will be something like this.

Step5: Corner Trim
Now, pick one of the Red Cedar Pickets and cut into through the middle.
After that cut them into 8 pieces according to the height of your box.
Now attach 2 of them on each side with 4 screws same as the image and cut the additional wood from the upper side. Now the frame will look like this.

Step6: Upper Frame
Now with the last pics of our Red Cedar Pickets, we need to cut them into 4 pieces according to the box outside measurements. Cut the corner in 45 degrees so that they can fit with each other like a picture frame. Those pieces will be fit into the top of your box. Place them into position and screw them with the box.

Your planter box is now ready and needs to give a quick polish. Before put plants on the planter box, some important tasks are left behind that you need to do. Get a spray bottle and mix one part of chlorine with nine parts of water and spray the surface of the planter. Scrub the planter with a plastic dish scrubber. This will kill the harmful insect for your plants.
The drainage system is also important for your planter. In order to keep the plants good in the container, a good drainage system is required in the planter.
Drill drainage holes in the bottom of the planter. Three or four 1/4-inch-diameter holes or one or two larger holes drain excess water out of a wood planter. Seat your planter on planter feet, flat stones, or other objects that elevate the wood off the deck, porch rail, or ground surface. You can do a quick check of how fast the water drains out by adding water. If the water runs out easily you are good to go with your wooden planter.
Leave a Reply